I’m so embarrassed to admit this is my SECOND, 2nd, segundo time I’ve blogged in 2017. So, after you read this you may as well go read that one too. I give some really neat ideas for all the things you can do with your beloved pictures (whether they are cell phone shots or professional photos). Check it out here.
Teacher gifts at Christmas/holidays stress me out. I try to put so much thought into them and be creative but I do realize gift cards are practical and so amazing to receive. But my creative side yearns for something else. This year I decided to check out Pinterest to find some ideas for ornaments the kids and I could make together. I stumbled on the snow globe idea and headed to A.C. Moore. Here’s what I found and what you need.
For roughly $35 I bought all the things needed to make 9 ornaments. So that’s about $3/4 per gift. Not too bad right?? Here’s what my basket looked like….
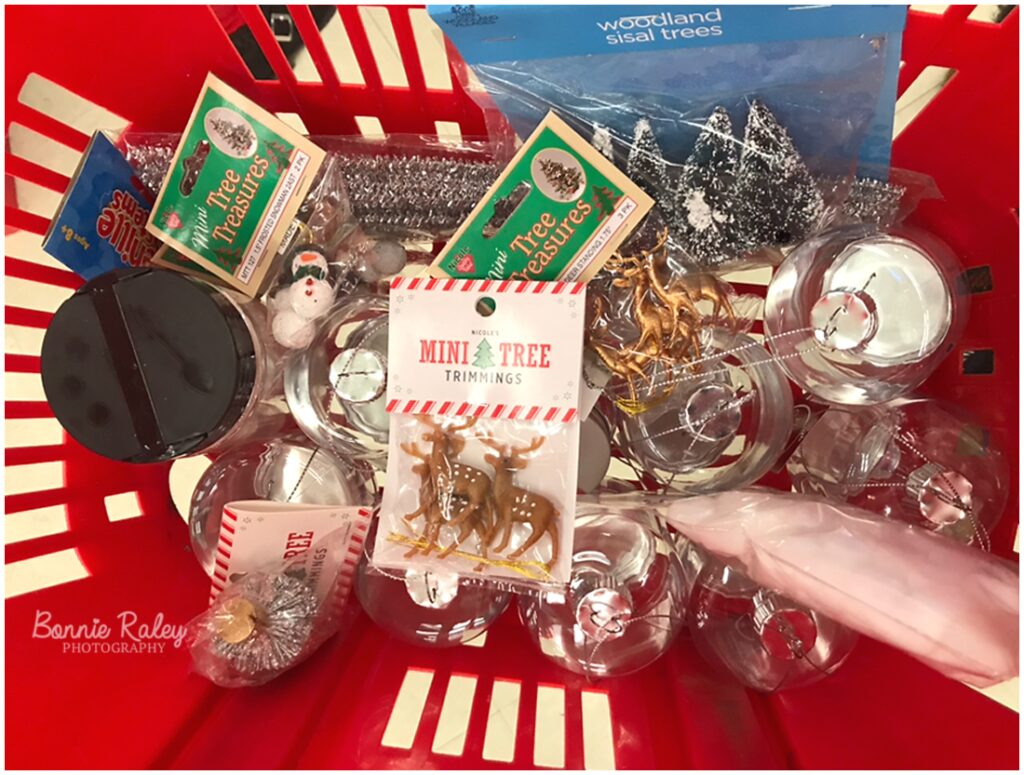
1-Globe/ornament (they have several options for only $1 per item)! I fell in love with the mason jar style ornament that is plastic by the way. They had other round ones, glass ones and even ones that looked like vintage light bulbs. Super cute too!!!!
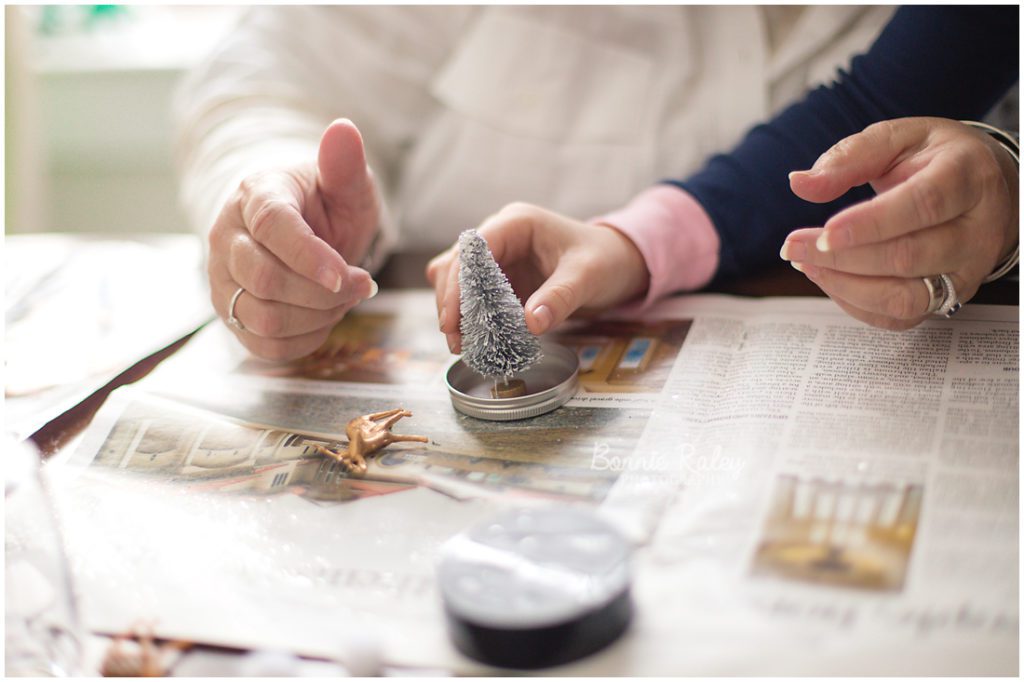
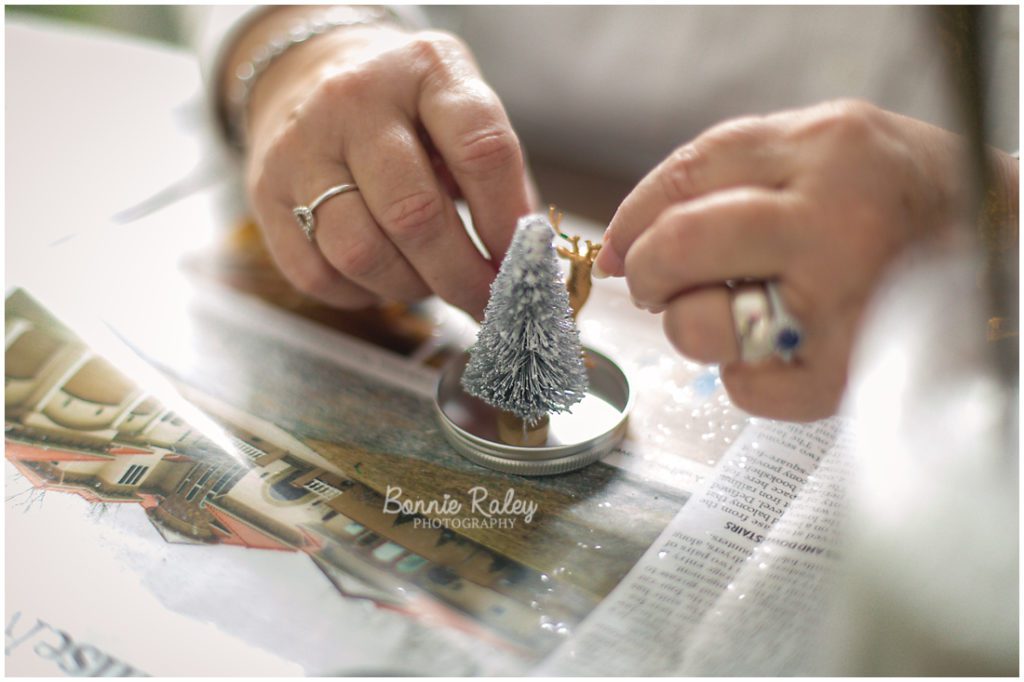
2-Itty bitty Christmas decor. Bottle brushed trees, tiny deer, wrapped presents, among other items are available in the mini Christmas tree ornament decor aisle. Ask an associate to point the way. Most items came in a multi pack for $2-3.
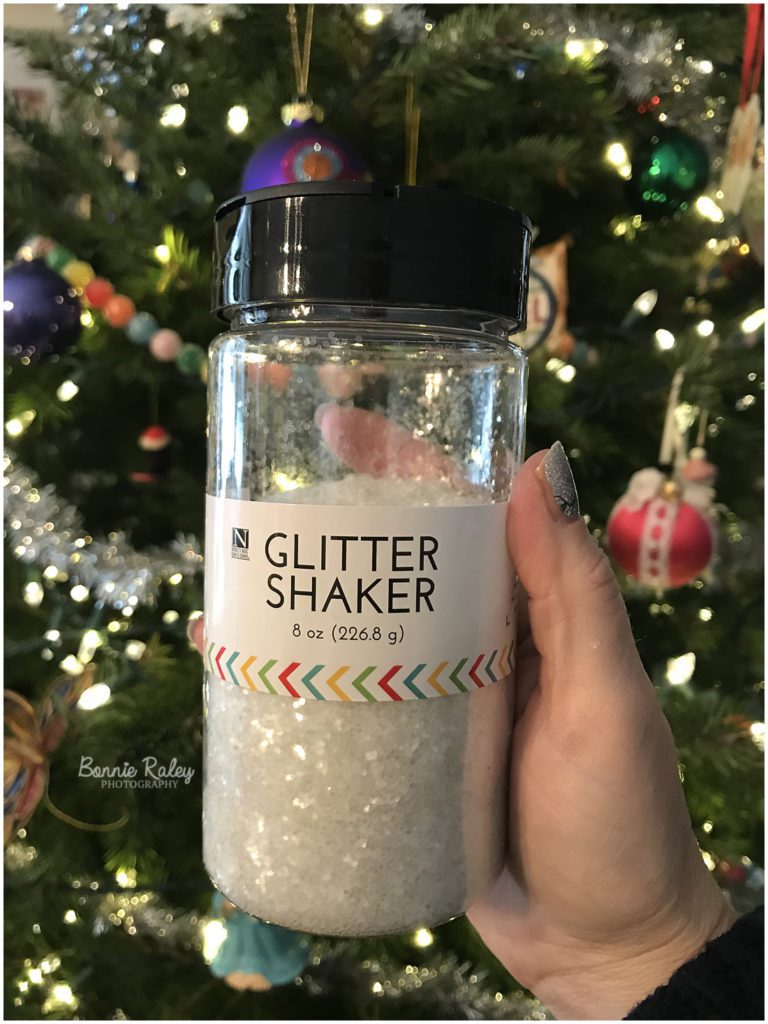
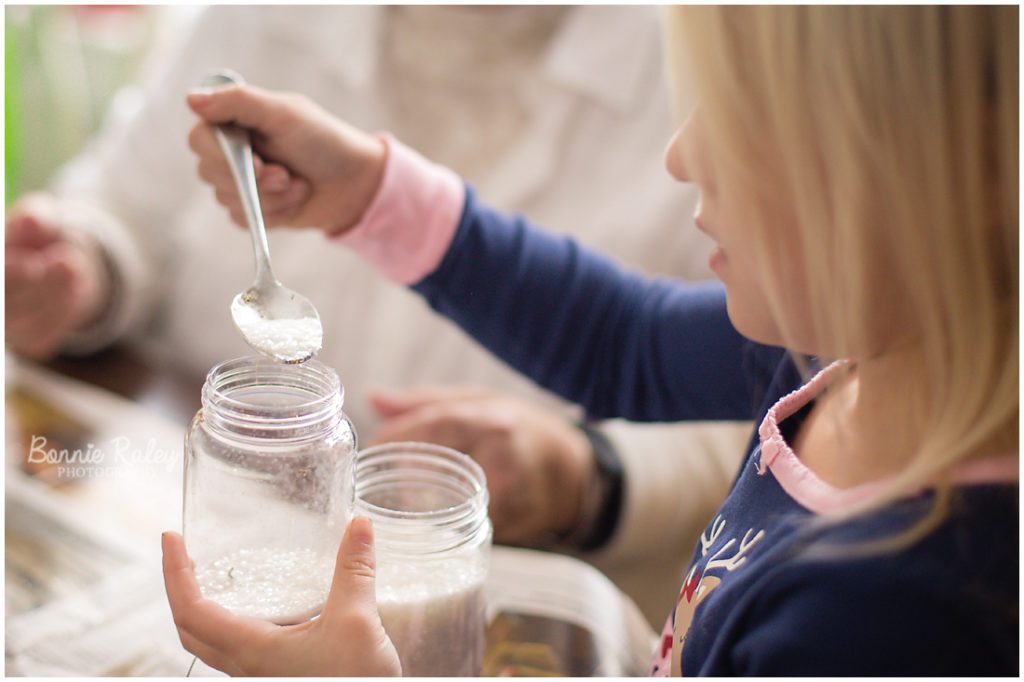
3-Glitter (large size was only half used to make 9 adorable ornament globes).
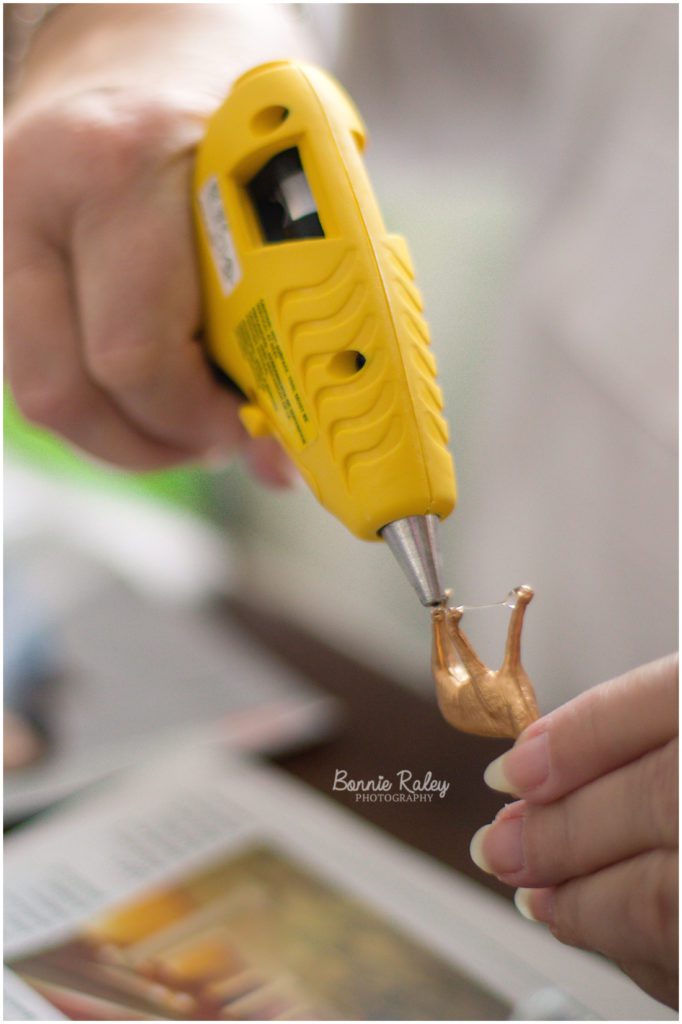
4-Hot glue gun
5-Ribbon to spruce it up!
6-Pom-poms. We used but weren’t critical. We ended up doing a few poms under the snowmen to raise them up a little higher.
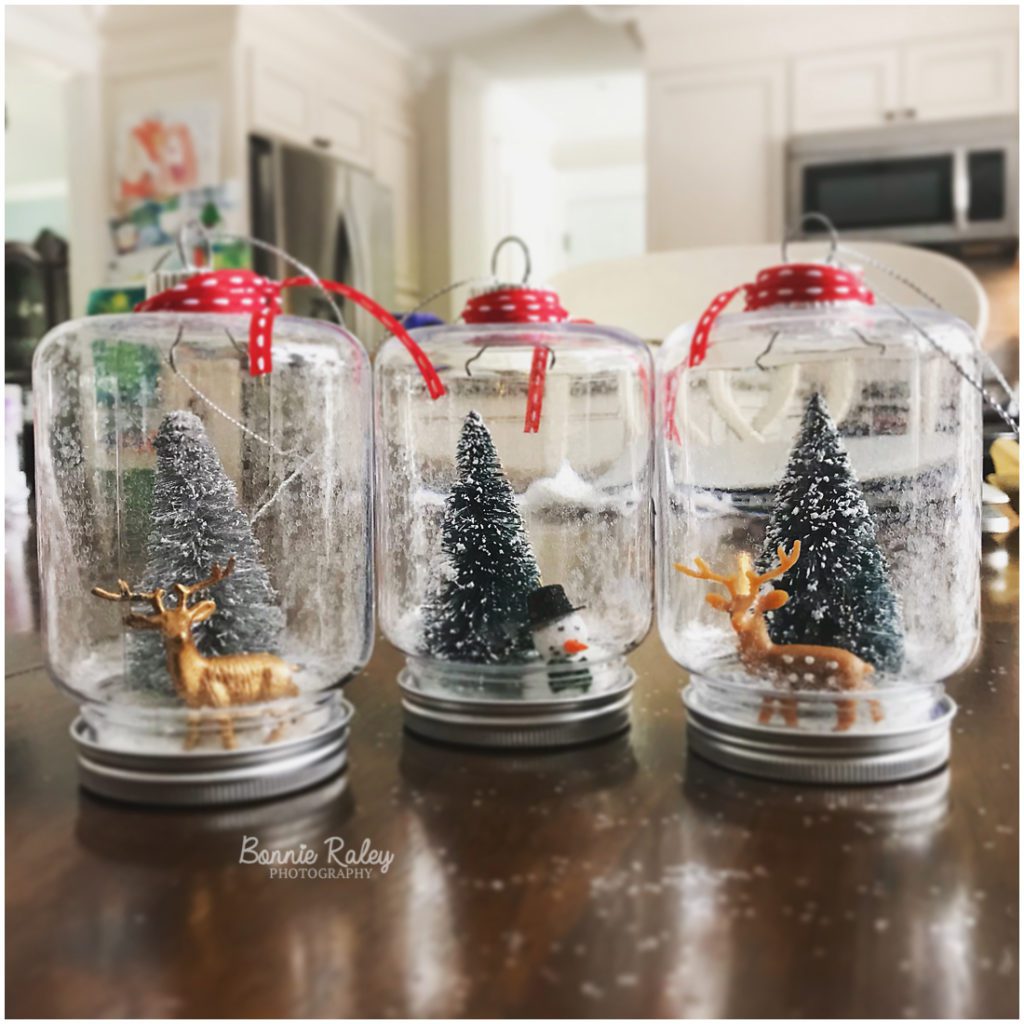
The instructions are fairly simple. Unscrew the lid, and hot glue the items to the lid. Pour some glitter (approx 3-4 tablespoons) into the globe and screw it back together. We also added a little extra glue at the top of the ornament to fill any gaps so the glitter wasn’t spilling out. The first one we made was trial and error and not perfect so its now on our tree. But we got our groove after that and they turned out great.

![]()
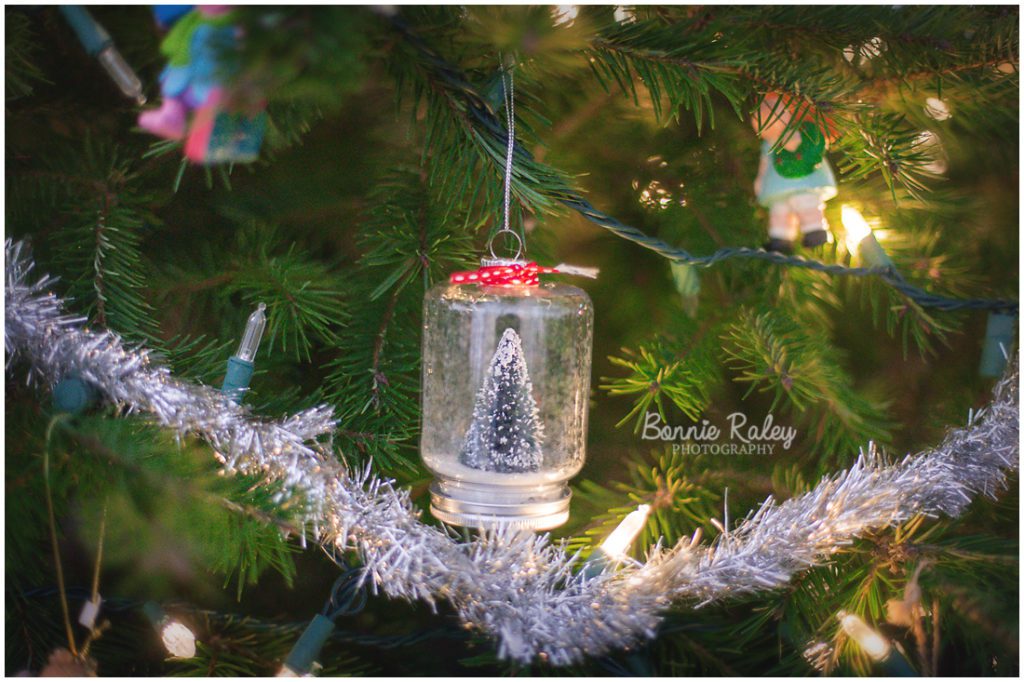
How great does it look on the tree? Get creative!! Have fun! I hope you enjoyed this tutorial!